

Vehicle Apps - Free Download & Official Reviews

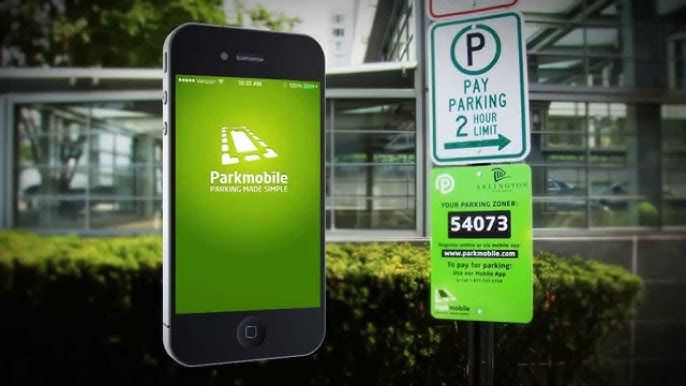
Easy Installation of ParkMobile
 4.5
4.5
For Android Devices:1. Swipe up the screen of your device to open the Google Play Store app.2. Search for “ParkMobile.” More simply, just visit the result page from here https://play.google.com/store/apps/details?id=net.sharewire.parkmobilev2&hl=en.3. To download the application, click on the button labelled “Install”.4. After the app appears, to start its usage, launch the app and create an account with the application.For iOS Devices:1. Open the Apple App Store.2. Search for “ParkMobile.” Or, simply view the corresponding page from here https://apps.apple.com/us/app/parkmobile-park-pay-go/id365399299.3. To get the app, click on the “Get” button.4. After installation of this app, you simply have to enter it and finish the registration process.For PC Users:ParkMobile can be used directly through any browser on the internet using ParkMobile at parkmobile.io. A first-time user of this service does not require any downloading of software, one has to register online.Fascinating Features of ParkMobileParkMobile offers several innovative features that enhance the parking experience:1. Find Parking Easily: The application enables the user to find open parking lot around their location through GPS navigation.2. Pay via Smartphone: Pay for parking through a smartphone without having to use coins or cash at all.3. Session Management: The app is capable of sending notifications for your parking session, and an option to renew the time set.4. Parking Reservations: People are able to book the parking spaces in advance hence guarantee that there will be parking space when they get there.

Easy Reservation and Management of Parking
4.5
How to Reserve Parking Spots:1. Open ParkMobile or website.2. Enter the location or parking zone number.3. Select your desired time and date.4. Confirm and proceed to pay.5. Confirmation will be provided through email or notification.How to Pay for Parking:1. Start parking session by clicking the button provided in the app.2. Enter zone number or scan the QR code of parking.3. Choose a payment method and confirm.4. Get instant confirmation and check your active session.How to Extend Parking Time:1. Navigate to your active parking session in the app.2. Tap “Extend Time” and add more time.3. Confirm and pay for the extension.4. Receive notification of your updated session.

ParkMobile Pro Benefits Explained
4.5
Subscribing to MembershipTo enroll in ParkMobile Pro:1. Launch the App or Website: Launch ParkMobile on your device, or open parkmobile.io.2. Tap to Open Settings Menu: Enter your account settings by tapping on your profile icon.3. Upgrade Option: Select “Upgrade to Pro”.4. Payment Process: Te follow the prompts for payment, usually around $0.99 per month, and your Pro membership will be activated.Unique FeaturesBy signing up with ParkMobile Pro, a host of premium features are unlocked for its users:1. Parking Availability Notifications: Get notifications on available spots near your location in real time, based on your preference.2. Quicker Checkouts: Experience faster checkouts during peak hours while booking parking spots.3. Priority Customer Support: Have priority access to special support channels for inquiries and issues about your reservations or how to manage your account.Using Pro FeaturesTo use these features:1. When looking for a place to park, have location services on to notify you when one is near.2. Checkout fast, which can save those valuable minutes when you have to run.

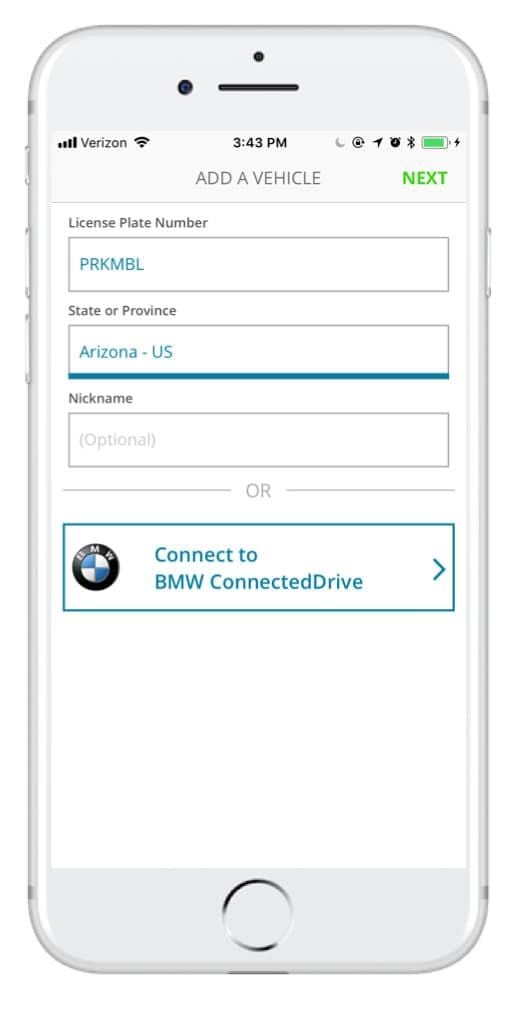
Add Vehicles to Your Account
4.5
How to Add Vehicles1. Access via App or Website: Access ParkMobile from your smartphone or visit parkmobile.io from your computer.2. Settings Menu: Tap your profile icon to open settings in-app or tap “Account Settings” if you use the website.3. Vehicles Section: Tap on “Vehicles”-you see listed any entries, along with an option to add new.4. Add New Vehicle:- Tap “Add New” or click the “+” button next to existing vehicles.- Fill in any of the required information: license plate number, state of registration, and nickname.5. Save Changes: After entering all of the information, tap “Save” or “Add Vehicle.” Do this for multiple vehicles per account, up to five per account.6. Default Vehicle - Optional: You might want to select a default vehicle. That way, each time you go to make a reservation, the system will default to this vehicle unless changed by you.

Update ParkMobile
4.5
For Android Users:1. Open Google Play Store: Launch the Play Store app on your Android device.2. Open My Apps & Games: Tap the menu button-three horizontal lines in the upper left corner-open “My apps & games.”3. Locate ParkMobile: Scroll down to the bottom to list all installed applications and search for ParkMobile there.4. If available, it will say “Update” next to it; click that to begin downloading a newer version.iOS Users:1. App Store, Apple: Open the App Store from your iPhone or iPad.2. Your Profile Icon: Tap the profile icon at the right top of the screen.3. Look Down for Updates: Now locate your pending list for updates; if ParkMobile is in there, tap “update” on it.For PC Users:Since ParkMobile is web-based and accessed through browsers on PCs, all updates are done automatically on the server side. In case any issue arises while using parkmobile.io, just refresh your browser.

Personalization with TouchTunes
4.9
That personal touch extends to its smart song recommendations and curated playlists that are constantly refreshed with new discoveries, all for you. Outside of your phone, the app connects you to more than 65,000 venues where Lightsync is being used: You can control what's playing remotely, check out the vibe before committing and skip the line with a Fast Pass feature that makes sure your favorite songs get heard quicker. You can earn song credits and boosts the more you play, so you'll continue receiving value throughout your personalized experience.

Scan & Go with Walmart+
4.8
What is Walmart+ Scan & Go?The Scan & Go technology works just that: you scan product barcodes through your smartphone, further tracking your real-time expenditure and completing payment inside the store. It’s only available to subscribers of Walmart+, which, in turn, is another reason to subscribe to the membership.Step-by-Step Guide to Using Scan & Go1. Make sure you have downloaded and installed Walmart onto your mobile device.2. Open the app, either near or inside a Walmart store.3. Tap Services, then select Scan & Go from the menu.4. Utilize your phone’s camera to scan barcodes of items as you go along; they’ll be added right to your virtual cart.5. Take a look at your cart total in the app; you can adjust quantities or remove items.6. Once finished shopping, proceed to a self-checkout area where you will scan a QR code displayed on one of their screens.7. Complete payment through your phone using saved payment methods; a receipt will be sent electronically.

Update Play Store
4.8
Where to Find Your Play Store Version1. Click Play Store icon on your device.2. Tap your profile picture in the top right, followed by “Settings.”3. Scroll to “About,” where your current version will be listed under “Play Store version.”How to Update Your Play Store1. Open the app.2. Tap your profile picture once more, followed by “Settings.”3. Under “About,” tap “Update Play Store.” If there’s an update available, it will start downloading and then install automatically.4. If you are already updated, it will say so in a message that your Play Store is current.Manual Update Using APK1. Download the latest Play Store APK from a well-trusted site, if you cannot update automatically.2. Go to Settings > Security > Unknown Sources, enable it.3. Download and install this APK to manually update your Play Store.